In this tutorial you will learn how to teach your Raspberry Pi to become a brave Automatic Identification System (AIS) receiver.
What is AIS? The Automatic Identification System (AIS) is an automatic tracking system used on/for ships. It transmits information like identification, position, course and speed.
Ingredients
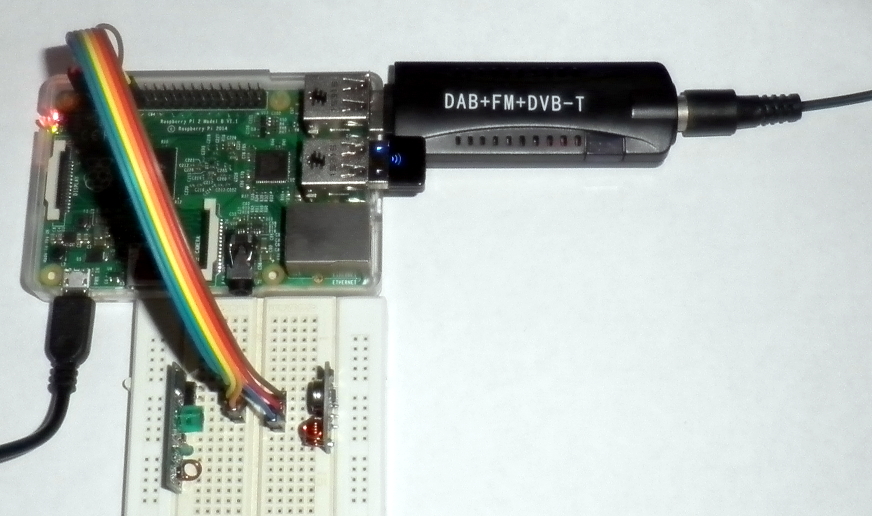
- Raspberry Pi (2 model B)
- DVB-T-DAB-FM receiver
- Client computer running OpenCPN
-
Buy DVB-T-DAB-FM receiver
Buy a cheap RTL2832U / RTL2838UHIDIR based DVB-T-DAB-FM receiver USB stick at i.e. eBay, DealExtreme etc. I bought mine for < 10 euro. Take a delivery time of several weeks into account.
-
Install Rasbian
Meanwhile make sure the the latest Rasbian is running at your Raspberry Pi (read this: How to install Rasbian at Raspberry Pi)
-
Install extra packages
Login to the console of your Raspberry Pi using SSH. Install software defined radio (SDR) package based on the Realtek RTL2832U chipset, version control system (GIT) and some extra development libraries needed as dependencies to compile RTL-AIS.
sudo apt-get update && sudo apt-get upgrade
sudo apt-get install rtl-sdr git librtlsdr-dev libusb-1.0-0-dev
-
Creating working environment
Make a working environment in your home directory at the Raspberry Pi and step into this new directory. In this directory we will download the source files and compile RTL-AIS.
mkdir ~/ais
cd ~/ais
-
Build RTL-AIS
- First clone the RTL-AIS GIT repository.
git clone https://github.com/dgiardini/rtl-ais
- Optional: Check the version you cloned:
git log -n 1
The HEAD of my cloned GIT repository is at commit: 5a03d3505639d2594f488ddc5391be1235c0130e, Mon Jul 27 10:37:08 2015 -0300.
- Step into the cloned directory:
cd rtl-ais
- Compile RTL-AIS
make
After a while, a new file exists in this directory: ‘rtl_ais‘. This is the executable which listens for AIS messages at a certain frequency, translates them into NMEA messages and send them to a defined UDP port at a specific host.
NMEA (short for National Marine Electronics Association) is a specification for marine communication and includes for example GPS data and data of a lot of other instruments.
- First clone the RTL-AIS GIT repository.
-
Prepare client computer
To be able to visualize the AIS/NMEA data, you have to install a decoder/client. I used at my Ubuntu (15.10) workstation OpenCPN as client. Besides of that ‘rtl_ais’ tries to send the data to UDP port 10110 at the computer which is running the client software, so you have to open this port in the firewall at the workstation for incoming UDP traffic from the Raspberry Pi.
- Install OpenCPN (at Ubuntu)
sudo add-apt-repository ppa:opencpn/opencpn
sudo apt-get update
sudo apt-get install opencpn
- Open firewall – Make sure the UDP port 10110 at your workstation is open for incoming traffic. This depends highly on your firewall configuration! For example:
iptables -A INPUT -p udp --dport 10110 -j ACCEPT
- Install OpenCPN (at Ubuntu)
-
Connect hardware
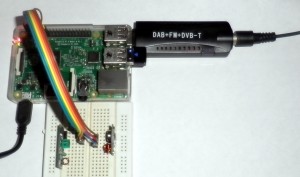 Now it’s time to insert the DVB-T-DAB-FM receiver USB stick into the Raspberry Pi. After inserting, check the output of the command ‘dmesg’. At the end there should be something like:
[ 2609.827861] usb 1-1.5: new high-speed USB device number 6 using dwc_otg
[ 2609.939903] usb 1-1.5: New USB device found, idVendor=0bda, idProduct=2838
[ 2609.939931] usb 1-1.5: New USB device strings: Mfr=1, Product=2, SerialNumber=3
[ 2609.939948] usb 1-1.5: Product: RTL2838UHIDIR
[ 2609.939965] usb 1-1.5: Manufacturer: Realtek
[ 2609.939981] usb 1-1.5: SerialNumber: 00000001
…indicating that the DVB-T-DAB-FM receiver has been recognised as RTL2838UHIDIR. Variations are possible.
-
Start receiving AIS messages
Now you can start RTL-AIS at the Raspberry Pi. For this we do need to know the IP address of the workstation which is running the AIS/NMEA client (OpenCPN). Besides of that I like it to see the decoded messages in my console, so I used parameter ‘-n’.
sudo ./rtl_ais -p 0 -R on -n -h 192.168.178.2
When you don’t see any messages after a certain time (let’s say 5 minutes), check the chapter ‘Troubleshooting‘. Stop RTL-AIS by pressing CTRL+C. Advance only to the next step when you are receiving messages indeed!
-
Start AIS/NMEA client
In this tutorial we decided to use OpenCPN as client and AIS data is send to port 10110 of the workstation.
- Start ‘opencpn’
- Click the Options-icon
- Connections-tab
- Add Connection
- Network
- Protocol: UDP
- Address: IP address of workstation (i.e. 192.168.178.2)
- DataPort: 10110
- Optional – Check “Show NMEA Debug Window” to see incoming messages.
Now wait for data and enjoy following vessels in your neighbourhood.
Results
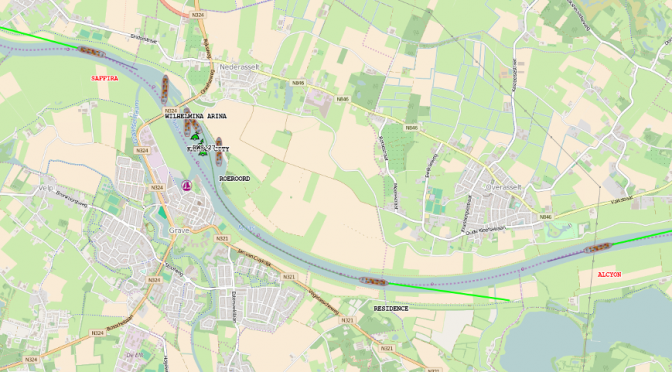
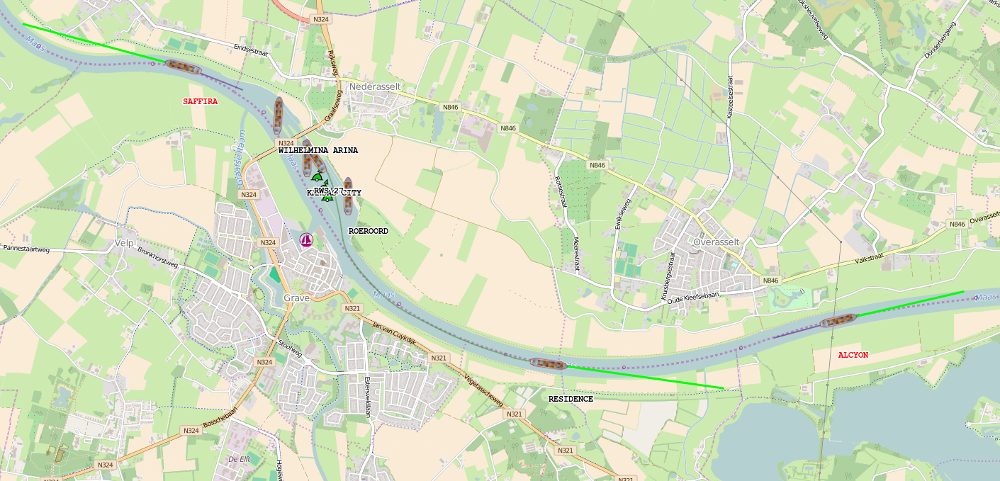
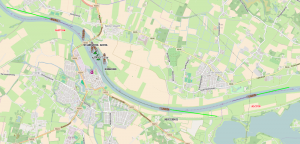
Example 1: Activity in canal lock Grave – The Netherlands
Check this time-lapse as example (best viewed in full-screen). Starring: Noorderlicht (MMSI: 244650819), Roeroord (MMSI: 244750033), Serena (MMSI: 244630092), Danique-F (MMSI: 205228790), Heavenly (MMSI: 244700610), Staay (MMSI: 244780486), Heumen (MMSI: 244780915), and Hulder (MMSI: 244700789). The MMSI is the Maritime Mobile Service Identity which is a series of nine digits to uniquely identify ships. (Best viewed full screen)
|
|
|

Example 2: Roeroord on the move (Martens en Van Oord)
Starring: Roeroord (MMSI: 244750033), Iris (MMSI: 244700937), Serena (MMSI: 244630092), RWS 27 (MMSI: 245380000), KVB Maranta (MMSI: 244650982), and Kansas City (MMSI: 244750436). (Best viewed full screen)
Troubleshooting
-
General
Preferable: Put the antenna as high as possible, with a free line-of-sight (outside).
-
Find the AIS frequency
Here comes a tricky part, find the AIS frequency for your hardware. It is possible that some deviations arose during manufacturing of the receiver. In that case you have to tune to another frequency as the default AIS frequencies which are build into the rtl_ais-executable. The AIS signal is transmitted to two channels (161.975MHz and 162.025MHz) it is designed like this to avoid interference, and to allow channels to be shifted without communications loss from other ships. The data will be duplicated to both frequencies, so we only need to find the AIS signal at least at one of these two frequencies. Just find the frequency with the highest signal/noise ratio. For this I used the software defined radio receiver ‘gqrx‘ at my Ubuntu workstation. Make sure packages ‘rtl-sdr’ and ‘gqrx-sdr’ have been installed and of course the DVB-T-DAB-FM receiver must be inserted into this computer. Tune to a frequency near 162MHz, narrow FM and a filter of +/- 12.5kHz. Fine tune to the frequency with small beeps, make a note of this frequency. For me 162.017MHz worked.
Now use this command to start RTL-AIS use the frequency which worked in your case:
sudo ./rtl_ais -r 162.017M -p 0 -R on -n -h 192.168.178.2
Bonus
-
Start RTL-AIS automatically after reboot
When everything works fine, you are maybe interested in how to start this AIS receiver automatically after plugging in the Raspberry Pi. The best way to do this, is to create an AIS receiver service at your Raspberry Pi. Learn in this article how to start RTL-AIS automatically after reboot.
-
Show the ships in a web browser
AIS data showed in an OpenStreetMap / OpenSeaMap. (Click image to enlarge) I extended this example with my own application. My application is a replacement for the OpenCPN-client, it enables me to show the ships in my web browser (like: Firefox/Chrome) without the usage of an extra client.
The application consists of mainly three parts:
- Java 8 software which listens for AIS/NMEA 0183 messages at a UDP port. Messages are received from ‘rtl_ais’. The Java program translates them to JSON messages and will send them to another UDP port.
- A Node.js program which serves static HTML, CSS and JavaScript documents. It listens for JSON messages received from the Java program and retransmits them using Socket.io.
- The HTML/JavaScript page contains an OpenStreetMap / OpenSeaMap and is rendered in the web browser. The JavaScript part is listening for new JSON messages which are received using Socket.io. On receiving a new message, a ship, name of ship, speed and trace will be plotted at the map. You can see additional information in a pop up by hovering over the ship.
This first two programs (Java- and Node.js) are running at my Raspberry Pi, part three is running in one or more (remote) web browser(s).
The ships are plotted in the OpenStreetMap / OpenSeaMap at their last received position. A trace at the back of the ship is showing the previous positions. The length of the line in front of the ship (green) is depicting the speed. It is possible to switch of one or more of the layers (Ships/Ship traces and OpenSeaMap). A red ship name indicates that we are not receiving any information from the ship any more, the ship and trace will be removed in a short time. On receiving information about a new ship, a bell sound and the name is pronounced using the eSpeak speech synthesizer / text-to-speech (TTS) engine.