 In this post I tell you what you need to know to use your Raspberry Pi for the first time.
After following these steps, you are running Raspbian on a Raspberry Pi.
Assumptions
- You are using Ubuntu (15.10)
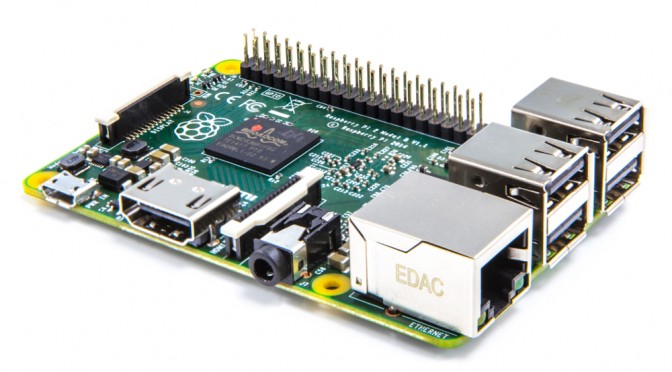
- You are using a Raspberry Pi 2 Model B
- You can power up the Raspberry Pi using a micro USB power supply (2 Ampère)
- You have an micro SD card (minimal 4 GB) available
- You have an Internet connection, so you can download the latest Raspbian image archive
- You have a USB keyboard and mouse
- You have a monitor/TV with HDMI input and HDMI cable
Perform these step at the computer desktop/laptop running Ubuntu (or another linux distribution)
-
Create a working directory
mkdir ~/raspbian
-
Step into the working directory
cd ~/raspbian
-
Download Raspbian
Download Raspbian image archive from raspberrypi.org (https://www.raspberrypi.org/downloads/raspbian/)
wget https://downloads.raspberrypi.org/raspbian_latest
or the lite version:
wget https://downloads.raspberrypi.org/raspbian_lite_latest
In my case this was Raspbian Jessie which is based on Debian Jessie.
-
Unzip Raspbian image archive
unzip raspbian_latest
The will extract the Raspbian image (i.e. 2015-11-21-raspbian-jessie.img) which must be copied to the SD card. You must use this file(name) later.
-
Identify the SD card
Put the SD card into the computer. Maybe you also have to use the micro SD card adapter to let it fit in your computer.
Execute the commanddmesg
Find at the end a line reading something like:
sd 4:0:0:0: [sdX] 31203328 512-byte logical blocks: (15.9 GB/14.8 GiB)
for sdX read something like sdb, sdc, sdd etc. You must use this device name (sdX) later.
-
Unmount the partition(s) of the SD card
At some systems, the SD card is mounted automatically. Be sure to umount these partitions. Use the command ‘df’ to see the mounted partitions of the card. Unmount each of them with the ‘umount’ command.
For example to unmount the first partition of SD-card C:umount /dev/sdc1
-
Copy Raspbian image to SD card
In this step you will copy the complete Raspbian disk image to the SD card.
Adapt the following command to your own situation, here is assumed that the name of the image file is: “2015-11-21-raspbian-jessie.img” and the SD card device is named: “/dev/sdb”. Caution: There is no partition number in the device name (/dev/sdb instead of /dev/sdb1). You don’t have to worry about partitioning and formatting.sudo dd bs=4M if=2015-11-21-raspbian-jessie.img of=/dev/sdb
Wait till you see the prompt again. You won’t see any progress indication.
-
Flush the write cache
Before removing the SD card, issue the command:
sync
and wait for the prompt. Maybe your computer detected the new partitions at the SD card and mounted them automatically, please unmount them again. Now it’s safe to remove the SD card from the computer.
Perform these steps using the Raspberry Pi
-
Insert all cables
- Plug the micro USB power supply cable into the Raspberry Pi, but not yet into the mains.
- Connect the monitor or TV with the Raspberry Pi, using the HDMI cable. You can switch on the monitor/TV already. Select the HDMI input at your monitor/TV.
- Connect a USB keyboard and mouse with the Raspberry Pi
-
Insert SD card
Insert the prepared SD card into the SD slot
-
Start the Raspberry Pi
Put the power supply into the mains
-
Check booting
The lights (LEDs) at the Raspberry Pi should turn on now. Red stays on (power) and green must start blinking, which indicates disk IO of the SD card. After some time the Raspberry Pi has booted Raspbian.
-
Use your Raspberry Pi running Raspbian
Congratulations, you installed Raspbian at your Raspberry Pi! Use your mouse and keyboard whether this is a ‘normal’ computer. Have fun with using your Raspberry Pi for the first time.
-
Shutdown
To minimize the chance of corruption of your file system, please shut down the operation system (Raspbian) before unplugging the power supply.
Menu->Shutdown...->Shutdown OK

